Beach Waves Made Easy: Your No-Fail Guide to Tousled Summer Hair
How to Get the Best Beach Waves at Home, No Salon Needed

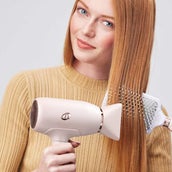
We’re fully embracing beach wave hair this season—but let’s be real, who has time for a salon visit every time a summer event pops up? That’s why the Rank & Style team has put together our favorite foolproof methods for getting beach waves at home. After testing all the top techniques and wave-enhancing products, we’re spilling the secrets to creating that just-back-from-the-beach look anytime you want.
In this beach-wave guide, you’ll find everything from styling tips for different hair types and lengths to step-by-step tutorials that actually work. Plus, we’re sharing the must-have tools, finishing sprays, and products our editors swear by for achieving soft, tousled waves that last. Ready to ride the wave? Let’s get into it.
How to Get the Best Beach Waves
After chatting with stylists and testing just about every wave-enhancing product under the sun, the R&S team can confidently say this: the key to long-lasting beachy hair is all in the prep.
If you want soft, defined waves that actually stay put, you’ll need to lay the groundwork first.
These are the favorite hacks we picked up along the way:
- Start with a smooth base.
Got texture? Create a blank canvas by blow-drying with a round brush or smoothing with a flat iron. - Match method to hair type.
Think heat for pin-straight hair that never has a prayer's chance for holding a curl and heatless for damage-prone locks. - Get the right products.
Texture-building products and beach wave hair sprays are the scaffolding that keep waves from falling. Use heat protectant products to create structure and prevent hair from getting frazzled. Volumizing products prevent limp waves that fade out quickly.
Tips to Make Beach Waves Last Longer
You’ve put in the effort, now let’s make those waves go the distance. A few strategic tricks can help keep your style intact from morning latte to sunset spritz.
To get a full day out of your beach waves, do this:
- Give waves something to "grip" by boosting texture with dry shampoo.
- For heatless beach waves, sleep with silk accessories that form curls as hair dries overnight.
- While smoothing and separating waves after the big reveal, avoid over-brushing. This can flatten the shape and leave behind faint “crimps.”
Ready to give your hair that sun-kissed, textured finish? Below, you’ll find our favorite tried-and-true methods and products for achieving beach waves—no trip to the ocean (or the salon) required.
All products and deals are sourced by the Rank & Style team using data and expert insights. If you shop through our links, we may earn a commission—at no extra cost to you.
01
How to Create Beach Waves on Short Hair

@trulyjamie
Short hair, don’t care—this tousled, effortless look is ideal for cuts that hit between the chin and collarbone. It’s especially flattering on straight or slightly wavy strands and works wonders for bobs and lobs that need a little extra movement. Our go-to method delivers soft, voluminous waves without veering into helmet-hair territory.
How to Do It:
- Prep with heat protectant. Start with a high-quality heat protectant that also adds volume—our pick for short hair is the Olaplex Volumizing Hair Heat Protective Weightless Blowout Mist. It builds lift from the root and sets the stage for styling. (Bonus: You can snag it with a Sephora coupon code.)
- Use a small curling iron or wand. A 0.75" to 1" barrel, like the Nano Titanium 1/2" Super Slim Wand,is ideal for short lengths. Curl small sections away from your face.
- Leave the ends out. This keeps the look undone and modern—no prom curls here.
- Texturize. Gently shake out your waves and mist with a sea-salt or texturizing spray for hold and definition.
Expert Tip: Alternate curl directions for a natural, beachy finish. If your hair tends to fall flat, especially at the roots, add a bit of root-lifting powder for extra volume and staying power. (Image credit: @trulyjamie)


02
How to Create Beach Waves on Long Hair

surface hair
Long hair and beach waves just work, it’s one of those match made in heaven combos that never goes out of style. Whether you're running errands or heading off on a dreamy beach getaway, this soft, boho-inspired look adds a touch of laid-back glam to any day. The best part? It flatters all hair textures and even works on long, layered haircuts, as long as your strands hit around the chest or longer.
How to Do It:
- Start with heat protectant. Always prep your strands to prevent damage and help your waves hold their shape.
- Curl with a 1.25” wand. Wrap medium-sized sections of hair away from your face using a larger curling wand to create soft, flowing waves.
- Let curls cool, then separate. Allow waves to set before gently finger-combing for that relaxed, undone finish.
- Lock it in with light-hold hairspray. We love the KRISTIN ESS HAIR Ultra Fine Workable Hairspray, it offers flexible hold without stiffness, and it’s made with clean ingredients. Bonus: you can shop it now with an Ulta Beauty coupon.
- Add shine. Finish with a few spritzes of Kevin Murphy SHIMMER.SHINE repairing mist to boost shine and smooth flyaways.
Expert Tip: For a more casual, low-key vibe, start curling at mid-shaft instead of the root. It gives that lived-in, I-woke-up-like-this effect without trying too hard.


03
How to Create Beach Waves on Natural Hair

@slayologystudioatl
Going from curly to beachy? We figured out how to transform natural curls into looser beach waves hair using both heat and heatless methods. It's a must-know style for natural type 3 or 4 curls if you love a stretched, waved look.
How to Do It (with Heat):
- Start with a smooth base. After detangling with a wide-tooth comb, blow-dry your hair using a high-quality heat protectant. Use the tension method—gently pulling sections taut as you dry—to stretch curls evenly from root to tip. We love the PATTERN by Tracee Ellis Ross Wide-Tooth Comb for this step.
- Flat iron to smooth. Glide your flat iron over each section with one to two passes to smooth strands without fully straightening them.
- Create bends with the flat iron. Working in small sections, tilt your flat iron toward and away from your face as you slowly pull it down the hair shaft to form soft, loose waves.
- Finish with fingers and cream. Gently separate the waves with your fingers, then smooth on a finishing cream or a styling product made for natural hair to lock in definition and moisture.
Prefer to go heat-free? Try this:
- Prep damp hair. After detangling with a wide-tooth comb, apply a curl cream to damp strands. We recommend Shea Moisture Curl Enhancing Smoothie Hair Cream for Thick, Curly Hair—it’s packed with coconut and hibiscus to help define and moisturize. Get it on discount with an Amazon promo code.
- Twist and pin. Take small sections of hair, twist them around your finger (aim for a coil that’s about the size of your finger from knuckle to tip), and pin them flat to your head with bobby pins.
- Wrap it up. Let your hair air-dry overnight, and protect it while you sleep with a silk bonnet.
- Unpin and define. In the morning, gently remove the pins, separate the waves with your fingers, and finish with your favorite defining cream or shine product.
Expert Tip: To keep moisture locked in and avoid heat damage, start your styling routine with a rich deep conditioner and a shine-boosting product. Healthy hair = better waves. (Image credit: @slayologystudioatl)


04
Beach Waves Tutorial With a Flat-Iron or Straightener

@AshleyIsBasicallyBlonde
No curling wand? No problem. You can still get those soft, tousled waves using the straightener you already own. This trick works best on straight or slightly wavy hair and is great for all lengths. Our go-to tool for this method is the BaBylissPRO Nano Titanium Flat Iron Hair Straightener 1" Curved Styler, it glides easily through hair and won’t leave your arms sore halfway through.
How to Do It:
- Prep and dry. Start with clean, dry hair and brush it out. Don’t skip the heat protectant,it’s key for keeping hair healthy while you style.
- Section it out. Grab 2-inch pieces and clamp the flat iron near the root.
- Twist and pull. Turn the iron away from your face and slowly glide it down the strand, keeping a smooth, steady motion as you go.
- Set and separate. Lock in the look with a lightweight hairspray or a beach wave spray. We’re fans of Rockaway Salt Spray, it gives that just-left-the-ocean texture without the stickiness. Run your fingers through your waves to separate them, but don’t overdo it. Use a Nordstrom promo code for the best price on this go-to salt spray.
Expert Tip: Don’t stress if your technique isn’t perfect—uneven bends and loose texture actually make your waves look more natural and beachy. (Image credit: @AshleyIsBasicallyBlonde)


05
How to Get Heatless Wavy Beach Hair

lenoites
Want the look without the heat? This method is perfect for damage-free styling—and the best part is, you can do it while you sleep. If your hair is medium to long, you’ll wake up with soft, beachy waves and zero hot tools in sight.
How to Do It:
- Start with slightly damp hair. You want it malleable, not soaking wet.
- Apply product. Work in a dollop of flexible-hold mousse or leave-in conditioner. We love Amika Hydro Rush Intense Moisture Leave-In Conditioner for its hyaluronic acid-infused formula that leaves waves smooth and nourished, not crunchy.
- Detangle thoroughly. Use a wide-tooth comb to make sure hair is smooth before styling.
- Section it out. Divide hair into four parts—two in front and two in back.
- Wrap and secure. Starting with one section at a time (alternating between front and back), wrap hair around a heatless curler or robe tie. The Kitsch Satin Heatless Curling Set is our go-to for soft, defined waves. Be sure to wrap away from your face like you would with a curling wand.
- Secure the ends. Use silk scrunchies to gently tie off each section without causing creases. We recommend Pure Silk’s 10-Pack Skinny Scrunchies, they stay put and won’t snag.
- Let it set. Air-dry overnight, and protect your style with a silk bonnet for extra hold and smoothness.
- Reveal and fluff. In the morning, gently unwrap the curls and tousle with fingers to break up the waves.
Expert Tip: Decide on your part before wrapping—once your waves set overnight, there’s no going back without redoing the whole style.


06
Get Beachy Waves With Overnight Braids

@angelicafitz
This classic no-heat trick is still one of the easiest ways to get soft, boho-inspired waves—especially when paired with the right products. It’s a go-to method for straight or wavy hair that hits shoulder length or longer.
How to Do It:
- Start with slightly damp hair. This helps your waves hold without waking up to frizz city.
- Add product. Smooth on an anti-frizz serum or braid balm. We love Bumble and Bumble Hairdresser's Invisible Oil for its lightweight finish and bonus heat + UV protection.
- Part and braid. Part your hair how you normally wear it, then create two or more braids. You can go with classic, French, or Dutch—whatever works best for your vibe.
- Secure the ends. Use soft hair ties, and if you can, sleep on a 100% Mulberry Silk Pillowcase from Quince. It helps prevent breakage and frizz (and yes, you can grab one with a Quince email signup discount).
- In the morning, undo and tousle. Gently unravel your braids and shake out the waves.
- Lock it in. Spritz with a shine-boosting hair spray to hold your look in place all day.
Expert Tip: For tighter, more defined waves, go with smaller braids. For a relaxed, beachy finish, two chunky braids will do the trick. (Image credit: @angelicafitz)


07
How to Get Beach Curls With a Curling Iron or Wand

@jesssouthern
Want classic, S-shaped waves with just the right touch of glam? A curling iron or wand is your go-to. This method works for most hair types but really shines on medium to long lengths, giving you those effortless, beach-to-red-carpet curls.
How to Do It:
- Prep with heat protectant and blow-dry hair straight for a smooth base.
- Grab 1” sections and curl in alternating directions using a large-barrel (1.5”) curling wand. Our pick? GHD's Classic Wave Curling Wand—it creates elegant, ribbon-like waves that last.
- Leave the ends out. That final inch should stay straight to keep the vibe relaxed and undone.
- Let curls cool before running your fingers through to separate.
- Add texture. Finish with a dry texture spray. We love VERB Volume Dry Texture Spray for adding soft grit and volume without making hair stiff or dull.
Expert Tip: Don’t overdo it—hold each curl for just five seconds. It’s enough to lock in shape without creating tight spirals. (Image credit: @jesssouthern)


08
Use a Triple-Barrel Waver for Beachy Hair

@ambermiller9
We saved the most iconic look for last—mermaid waves. This technique creates bold, evenly spaced curves with that signature beachy texture. It’s especially great for straight or slightly wavy medium to long hair. To get the look, you’ll need a triple-barrel waver. Our top pick? The Drybar Mixologist Interchangeable Styling Iron, which comes with three snap-on attachments and an ergonomic design that makes styling feel less like a workout.
How to Do It:
- Start with dry, brushed hair and spritz on heat protectant. We recommend COLOR WOW Dream Coat Supernatural Spray for smoothing strands without weighing them down.
- Split your hair in half, clipping the top section up and out of the way.
- Clamp the waver down on a 2- to 4-inch section near the roots and hold for five seconds.
- Work your way down the strand, repeating the clamp-and-hold motion. Leave the bottom inch or two out for a more natural finish.
- Let your waves cool, then gently separate with a wide-tooth comb—no brushing allowed!
Expert Tip: For waves that really last, lightly mist each section with a flexible-hold hairspray before clamping. It helps lock in that perfect ripple effect. (Image credit: @ambermiller9)


.png?width=172)

.png?width=172)